The goal of this series is to introduce some best practices in the local development environment and create a CI/CD pipeline for NodeJS applications.
GitHub repo for this article series: https://github.com/jeanycyang/js-in-pipeline
In this article, we will create a CI/CD pipeline and focus on the CD process.
This article is also the final article of the series. Thank you for reading!
Currently, we have finished the CI process. The last step is to deploy our dockerized NodeJS application to the cloud platform of our choice.
We use Amazon Web Services (AWS) in this series.
In our CI/CD pipeline, after all the CI steps are done successfully, we start to build the Docker image, push the Docker image to our private Docker registry and then start a new Docker Container using the latest image.
Build Docker Image
# https://github.com/jeanycyang/js-in-pipeline/blob/87db77b8100973f280f9301dbc574e1b99f70043/.travis.yml

sudo: required # required by Docker

language: node_js
node_js:
  - 10.19.0
cache: npm

services:
  - docker

script:
  - npm audit
  - npm run lint
  - npm test

after_success:
  - docker build -t giftcodeserver:$TRAVIS_COMMIT .
After all the scripts succeed, Travis CI will start to build our Docker image. This documentation tells us the environment variables in Travis CI build we can use: https://docs.travis-ci.com/user/environment-variables/
It is a best practice to tag a Docker image properly. We tag the new-built image using the Git commit SHA so that every tag is unique. If we need to roll out or roll back to a specific version, by Git commit SHA, we can find the target version in seconds.
Push to a Private Docker Registry
What is Docker Registry?
A [Docker] registry is a storage and content delivery system, holding named Docker images, available in different tagged versions.
https://docs.docker.com/registry/introduction/
Just like remote Git repository storing your codes for you, a remote Docker registry also stores your Docker images so that everyone with permission can access it and download the needed Docker image.
Generally speaking, open-source project images are pushed to DockerHub, the largest Docker registry in the world and set as public so that everyone can download. However, let’s say we are developing a commercial product. Our code is hosted in a private GitHub repository. Then our Docker images should be private as well — only when you have permission can you download.
Even though you can also set your Docker repository as private on DockerHub (you need to pay if you want to have more than one private repository), it would be more convenient if you store your Docker images on your cloud platform. Most cloud platforms also provide Docker-repository-as-service, such as Google Cloud Platform’s Container Registry and AWS’s ECR.
As we use AWS in this series, we will push our images to AWS ECR.
Push to AWS ECR
after_success:
  - pip install --user awscli
  - export PATH=$PATH:$HOME/.local/bin # add AWS in PATH
  - eval $(aws ecr get-login --no-include-email --region $AWS_REGION)
  - docker build -t giftcodeserver:$TRAVIS_COMMIT .
We add 3 steps in after_success.
We need to install AWS CLI. By using AWS CLI, we can manage our AWS services. Then we add AWS CLI to PATH.
Later, we login to the ECR registry.
But, how does AWS CLI know which AWS account we are using, are we permitted to that account and are we permitted to login to ECR?
The answer is, we need to add at least two environment variables to let AWS CLI know our identity. They are AWS_ACCESS_KEY_ID and AWS_SECRET_ACCESS_KEY.
Create AWS_ACCESS_KEY_ID and AWS_SECRET_ACCESS_KEY
Let’s login to the AWS management console and go to IAM. Click “Users” then there will be a list of all the existing users.

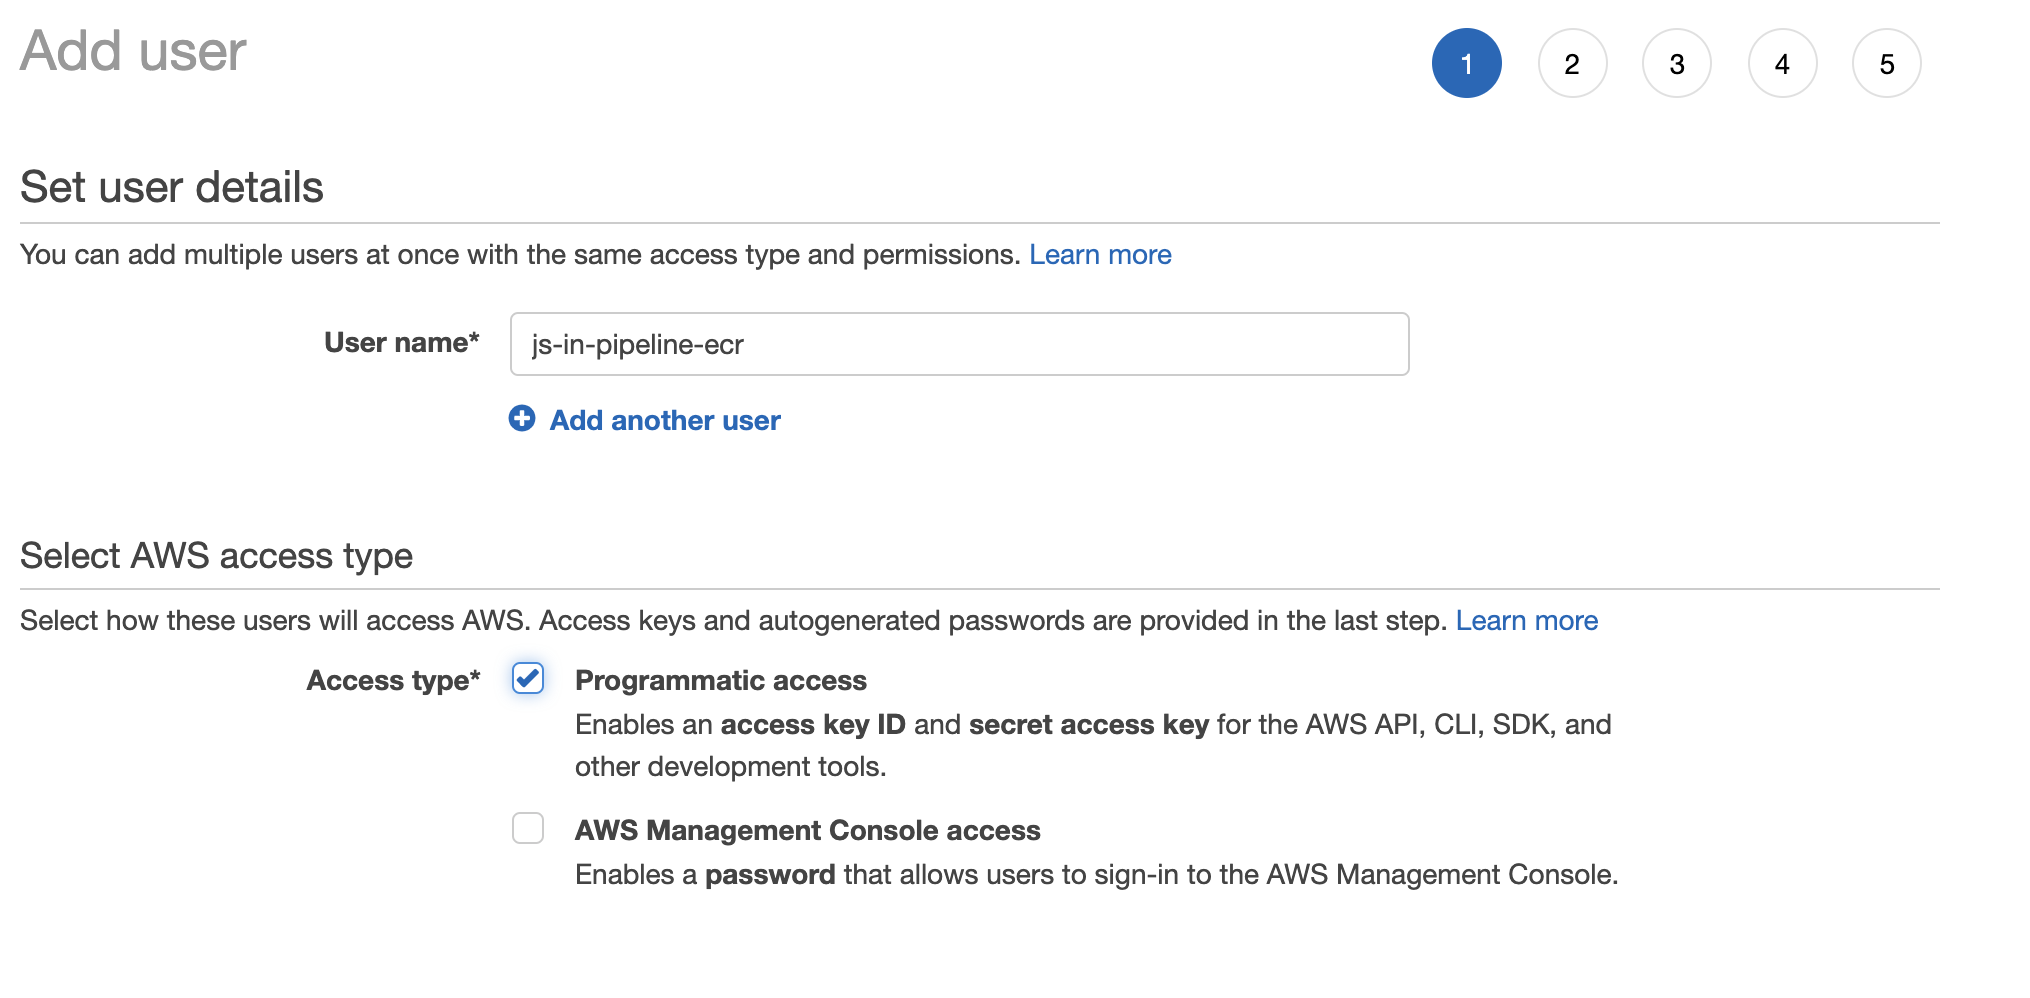
Click “Add user” button. We are going to create a “programmatic access” user. We will use this user to login to our AWS account in TravisCI build.

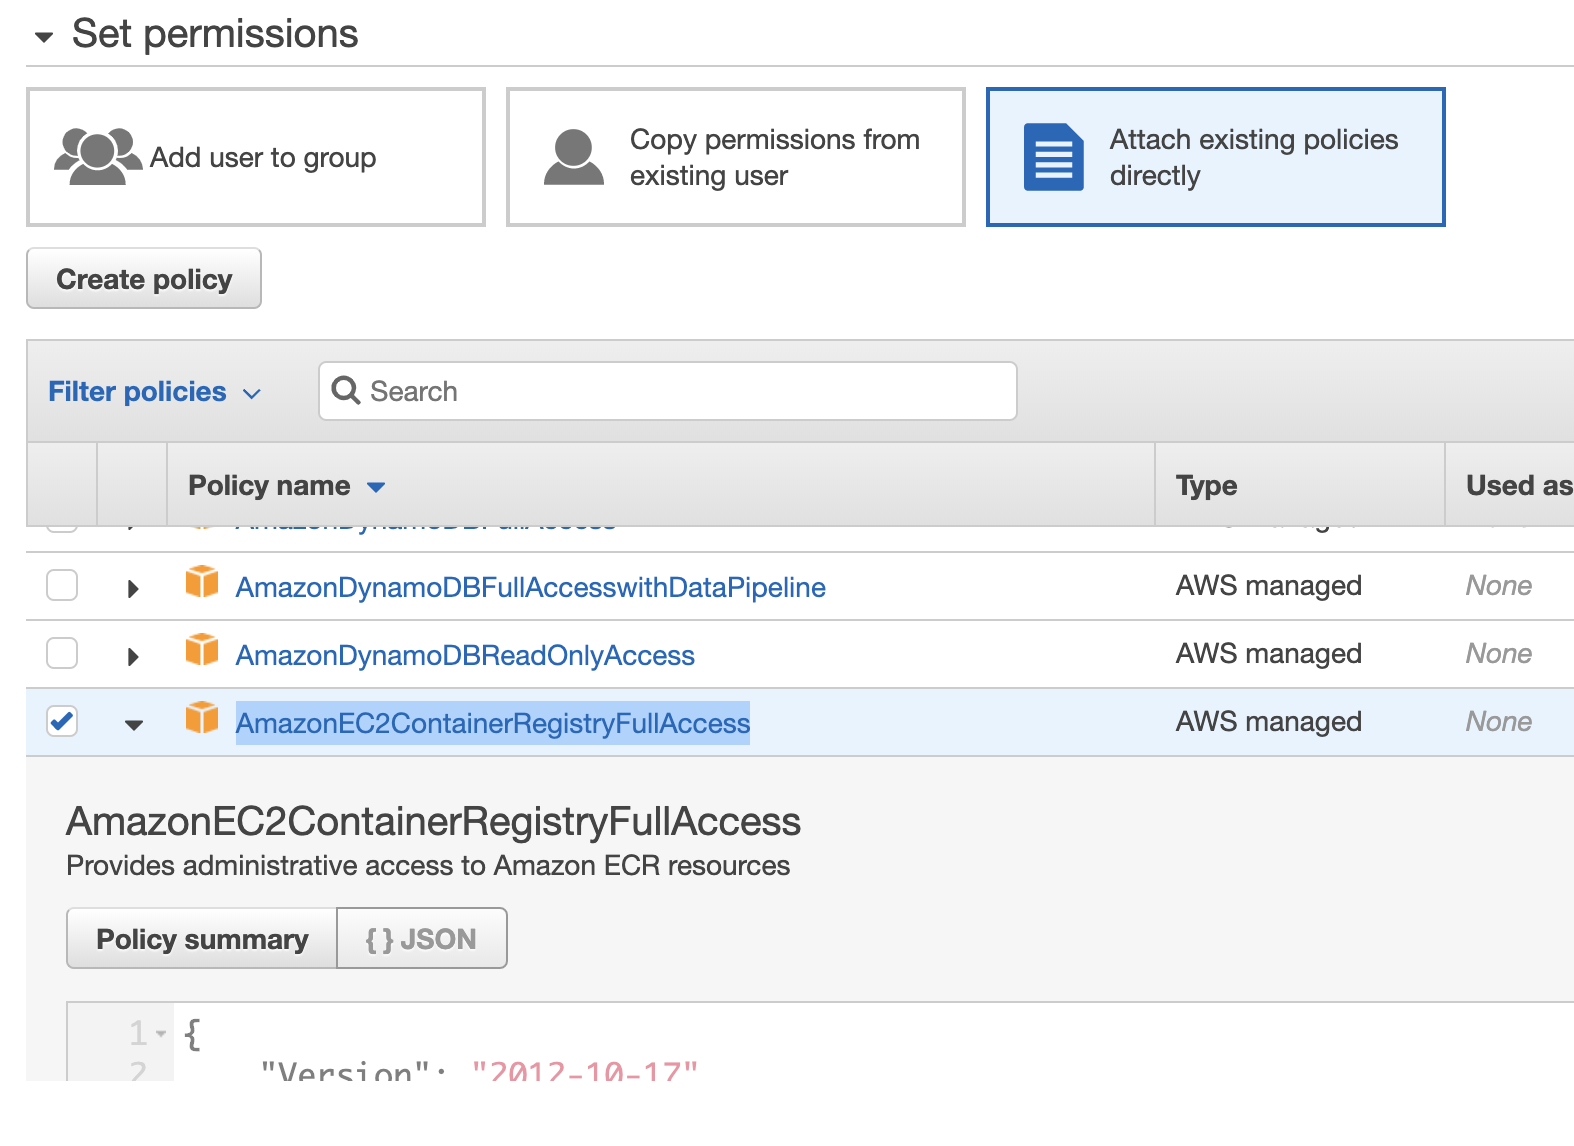
At step 2 “Set permissions”, select “attach existing policies directly” and find “AmazonEC2ContainerRegistryFullAccess”. This policy allows a user to have full access to AWS ECR. You should not give this user any other permissions as it should only be used to access ECR.

After the creation, AWS will give you this user’s AWS_ACCESS_KEY_ID and AWS_SECRET_ACCESS_KEY. Download the CSV file or copy access key id and secret access key somewhere.

Also, you can find your AWS account ID on this page: https://console.aws.amazon.com/billing/home?#/account.
The AWS account ID is a 12-digit number, such as 123456789012.
https://docs.aws.amazon.com/general/latest/gr/acct-identifiers.html
Set Environment Variables on TravisCI
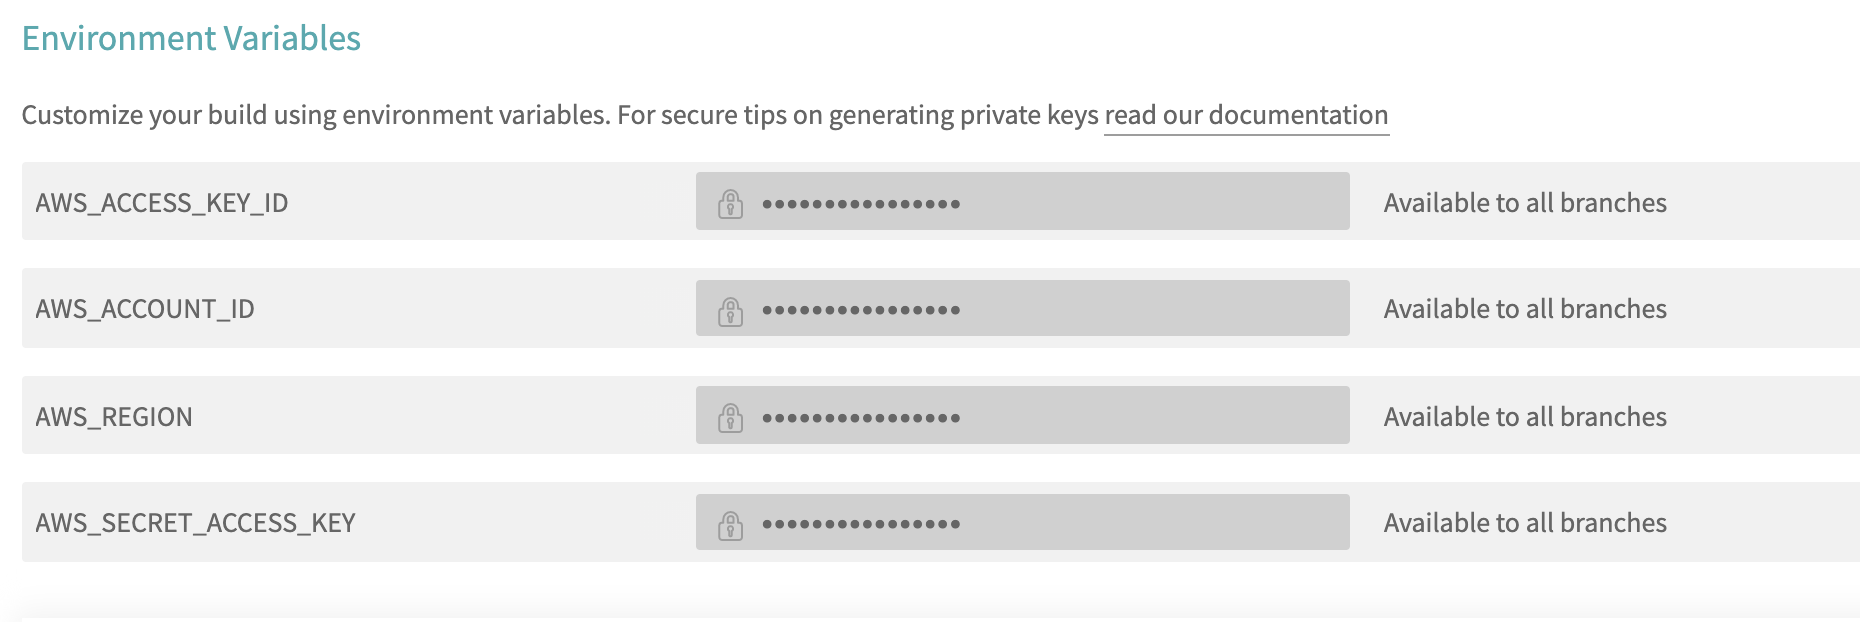
Let’s go to the settings page of the repository on TravisCI and add 4 environment variables — besides AWS_ACCESS_KEY_ID and AWS_SECRET_ACCESS_KEY, we also add AWS_ACCOUNT_ID (the AWS account ID) and AWS_REGION (choose your most used one, e.g. eu-central-1).


Now, we should be able to login to ECR!
Create a Repository on ECR
Go to the ECR page in the AWS management console and create a new repository that will store our Docker images. It is named “giftcodeserver” in this case.

We are ready to push to the repository on our AWS account!
after_success:
  - pip install --user awscli
  - export PATH=$PATH:$HOME/.local/bin # add AWS in PATH
  - eval $(aws ecr get-login --no-include-email --region $AWS_REGION)
  - docker build -t giftcodeserver:$TRAVIS_COMMIT .
  - export DOCKER_REGISTRY_URI=$AWS_ACCOUNT_ID.dkr.ecr.$AWS_REGION.amazonaws.com
  - docker tag giftcodeserver:$TRAVIS_COMMIT $DOCKER_REGISTRY_URI/giftcodeserver:$TRAVIS_COMMIT
  - docker push $DOCKER_REGISTRY_URI/giftcodeserver:$TRAVIS_COMMIT
After docker build , we need to tag the newly built image as $DOCKER_REGISTRY_URI/$REPOSITORY_NAME:$TAG. The URI should be the same as shown on ECR.

ECR URI format: [AWS account ID].dkr.ecr. [AWS Region]. amazonaws.com/ [Repository name]
That’s why we also add AWS_ACCOUNT_ID and AWS_REGION as environment variables on TravisCI.
Now, if a build succeeds, it will automatically build its Docker image and push it to our remote Docker Registry i.e. AWS ECR in this case!
Deployment
The final step(s) of a CD process is to deploy the latest changes.
It could be extremely complicated and there are many deployment techs, such as Blue-Green deployment. Nowadays, Kubernetes is also an extremely popular solution!
The deployment process is beyond the scope of this series. It might need another 7-article series to introduce and explain! Therefore, I will leave it to other articles.
It might look like:
after_success:
......
  - terraform plan
  - terraform apply # tf file contains ECS config and a ECS task for giftcodeserver
or
after_success:
......
  - kubectl config set-context ....
  - kubectl -f ./giftcodeserver-deployment.yaml
Nonetheless, we still got the idea of the CD pipeline. After you decide your CD process, you can add them to after_success to finish the final process — deployment!
Thank you for reading the articles! I hope you enjoy reading my articles and learn something from them.
Any feedback or comments are very welcomed!
![[Note] React: Performance & Patterns](https://static.coderbridge.com/images/covers/default-post-cover-1.jpg)

